
What's Behind the Tile: How a Shower Should Be Waterproofed

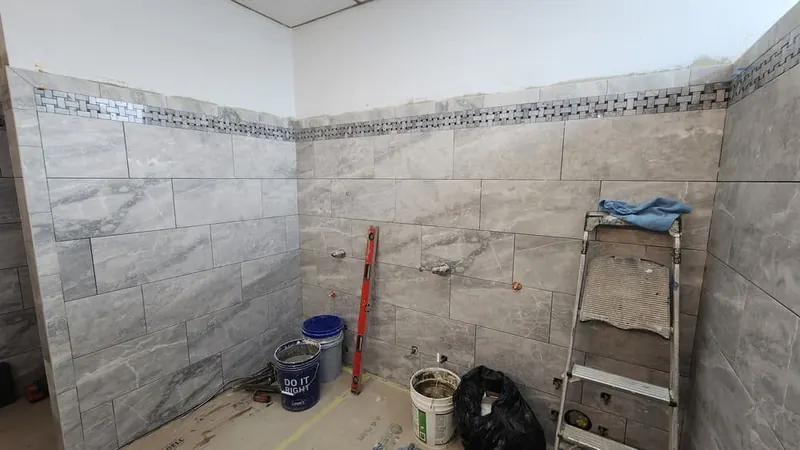
Who this is for: homeowners who want a shower that won't leak into the walls or the ceiling below, and who want to know what to ask a contractor before the tile goes up.
Short answer: tile and grout are the finish, the membrane is the waterproofing
Tile and grout don't keep water out of your walls. Grout is porous, so every shower pushes some water through it. A properly built shower has a continuous waterproofing membrane behind the tile, on the walls and the floor, sealed at every corner, seam and pipe opening and tied into the drain. If that layer is missing or has gaps, the shower can look perfect for a year or two while water soaks into the framing.
The layers of a waterproof shower
From the studs out, a tiled shower built with a bonded membrane goes together in this order:
- Framing. Studs and floor framing, checked for rot and straightened, with solid blocking added wherever grab bars, a seat or glass anchors will go.
- Backer and sloped floor. A wall board approved by the membrane maker, and a floor sloped toward the drain.
- Waterproofing membrane. A sheet or liquid membrane bonded to the walls and floor, with overlapping seams, preformed corners, sealing collars at the valve and shower head, and a connection to a drain designed to bond with it.
- Thin-set mortar. The adhesive that bonds tile to the membrane.
- Tile and grout. The finish layer: what you see and clean.
- Flexible sealant. At inside corners and where walls meet the floor, so normal movement doesn't crack the grout.
One common example is the Schluter-KERDI system. Schluter describes KERDI as a pliable, sheet-applied, bonded waterproof membrane and vapor retarder made for direct application of tile, and lists it with ICC-ES and cUPC. Waterproof membranes for tile are covered by ANSI A118.10, the national standard for load-bearing, bonded, waterproof membranes under thin-set tile. On our tiled showers, we name the waterproofing system in writing before installation. To see finished work, look at our custom tile showers.
Why grout isn't the waterproofing
Cement grout and many tiles absorb water, and sealers slow that down without stopping it. That's normal and expected, as long as the membrane behind the tile is doing its job. It's also the main difference between a tile shower and a one-piece unit. If you're still deciding between the two, see our comparison of tile vs. acrylic insert showers.
Where showers actually fail
Most leaks start at a handful of spots where the membrane is cut, folded or joined. These are the places to ask about.
| Weak spot | What goes wrong | How it's done right |
|---|---|---|
| Inside and outside corners | Membrane folded or stretched; seams don't overlap | Preformed corners and overlapping seams, bonded fully |
| Niche | Corners of the box left open; sill slopes back toward the wall | Membrane wraps every face of the niche; the sill slopes into the shower |
| Valve and shower head | Gap around the pipe or valve body | Sealing collars or gaskets bonded around each opening |
| Curb | Top of the curb sloped outward; membrane not wrapped over it | Membrane covers the curb fully; the top slopes back into the shower |
| Drain connection | Membrane not bonded to the drain, so water runs under it | A drain made to bond with the membrane, sealed all the way around |
| Glass anchors and grab bars | Screws drilled through the membrane and left unsealed | Blocking planned ahead; every screw hole sealed |
Shower pan vs. tiled floor: how the drain ties in
A shower pan, in everyday use, is a prefabricated base: one molded piece with the slope built in. Water stays on its surface, and the wall waterproofing has to lap over its flange so water running down the wall lands inside the pan. A tiled floor is built on site: the slope is formed first, the membrane goes over it, and the drain has to be one that bonds to that membrane so the floor and walls act as one waterproof shell.
A pan is quicker and keeps the cost down. A tiled floor lets you choose the size, the drain style (center or linear) and how low the entry can go. Both work when they're installed to the manufacturer's instructions.
Older methods you'll find in Bismarck homes
When we tear out older showers, the method behind the tile tells us a lot about why it failed. The usual culprits are tile on drywall or green board, cement board with no waterproofing behind it, a rotted subfloor at the curb, and mold behind old tub surrounds.
- A liner under a mortar bed. The traditional method: a flexible liner sits under a thick mortar floor, and water that soaks into the mortar drains through weep holes in the drain. It can work for decades when done right. Clogged weep holes or a pierced liner are the common problems.
- Tile on drywall or "green board" with no membrane. Common in older bathrooms. Once grout cracks, water reaches the board directly.
- Plastic sheeting behind cement board. The sheeting stops water at the stud face, but the board in front of it stays wet longer.
Sheet membrane or liquid membrane — and why the flood test matters
Both work when they're installed to the manufacturer's instructions. Sheet and liquid membranes are both covered by the same standard, ANSI A118.10, and TileLetter, the tile industry's trade magazine, notes that the two common bonded shower methods in the TCNA Handbook (B421 and B422) accept either one. Neither type is leak-proof if it's installed carelessly. The difference between a dry shower and a leaking one is how the seams, corners and drain are done, and whether the result is tested before tile covers it.
Sheet membranes
A sheet membrane is a factory-made layer of even thickness, bedded in thin-set mortar on the walls and floor. Because the factory sets the thickness, nobody has to judge whether enough went on. The weak points are the joints and the mortar bond. For its KERDI membrane, Schluter specifies that seams either overlap by 2 inches or butt together under KERDI-BAND, set in the thin-set mortars it lists. What can go wrong:
- Seams that don't overlap enough, or corners folded by hand instead of preformed pieces
- The wrong thin-set, or mortar that doesn't fully embed the membrane, leaving voids
- Wrinkles, tears or screw holes left unpatched
Liquid membranes
A liquid membrane is rolled or brushed on and cures into one seamless, rubbery layer, which makes it easy to wrap around niches, benches and odd shapes. The weak point is thickness: it has to go on thick enough everywhere. The RedGard data sheet, for example, calls for at least two coats at a set coverage rate, reinforcing tape at changes of plane, and ambient and surface temperatures above 40°F during installation and for 72 hours after, which matters in a cold North Dakota house with an open exterior wall. LATICRETE's HYDRO BAN Quick Cure data sheet tells installers to check thickness with a wet film gauge. What can go wrong:
- Coats that are too thin or uneven, or pinholes
- No reinforcing tape or fabric at corners, seams and changes of plane
- Tiling or flood testing before the membrane has cured, or applying it in a room colder than the data sheet allows
One mistake with both: doubling up
Adding plastic sheeting behind a surface membrane "just to be safe" can backfire. The Ceramic Tile Education Foundation's Tile Tip says never to install a vapor retarder membrane and a topically applied waterproof membrane on a shower wall, because moisture can be trapped between them.
What a flood test is
A flood test, also called a water test, checks the shower floor for leaks after waterproofing and before tile. The drain is plugged, the floor is filled with water, the water line is marked, and the shower sits. Schluter's instructions say to wait at least 24 hours after setting KERDI before testing (longer in a cool room), fill to about the height of the drain's bonding flange, and leave the water in for a set time, with 24 hours typical. A curbless shower needs a temporary dam at the entry. Liquid membranes are tested once they've cured per their own data sheet, which ranges from minutes for some fast-cure products to when both coats are fully dry for others.
Schluter adds that a water test may be required by building code officials and is considered best practice, and a trainer quoted in TileLetter puts it simply: "Every method requires flood testing." If the water line drops or moisture shows up below, the leak is found and repaired, and the floor is tested again before any tile goes on.
Questions to ask about the membrane
- Is it a sheet or a liquid membrane, and does it meet ANSI A118.10?
- For a sheet: how are the seams lapped or banded, and which thin-set do you use?
- For a liquid: how many coats, and how do you check the thickness?
- What goes into the corners, the niche and around the valve and drain?
- What happens if the flood test fails?
For a tiled shower, we identify the waterproofing system in writing before installation, for example Schluter-KERDI, a sheet membrane. A liquid membrane installed to its data sheet is a sound choice too; what matters is that one system is followed from the drain to the top of the wall.
How we check it before the tile goes on
The waterproofing stage is the only time anyone can inspect the membrane, so it should be checked before tile covers it. The flood test described above is one way to do that check. Ask how the seams, corners and drain are checked on your shower and when you can see them before tile is installed; the check depends on the waterproofing system, and for KERDI, Schluter says to wait at least 24 hours after installation, under normal conditions, before a water test.
If you want to see the waterproofing before tile goes in, let us know before installation.
If it fails: who covers what
A leak can come from a defective product or from how it was installed, and those are covered by different warranties. Our projects come with a one-year workmanship warranty and a free 12-month check-up after a full winter and summer; product coverage depends on the manufacturer and the item installed. Read how our warranty works. If your shower leaks, call our office at (701) 929-8727 with the project address, installation date, a description and photos if available. We'll review the concern against the workmanship and product terms for your project.
Signs your current shower is leaking behind the wall
- Loose tiles, or tiles that sound hollow when you tap them
- Grout that stays dark long after the shower has dried
- Cracked grout or caulk at the corners and along the floor
- Stains, bubbling paint or soft spots on the ceiling below or the wall on the other side
- A musty smell that doesn't go away with cleaning
- A soft or spongy floor near the curb or the toilet
- White, chalky deposits on the grout
One sign is a reason to look closer. Two or three together usually mean water is getting behind the tile.
5 questions to ask any shower contractor about waterproofing
- Which waterproofing system will you use on the walls and on the floor?
- How do you seal the corners, niche, valve, shower head and drain?
- Do you test the floor for leaks before tile, and how long is the test?
- Can I see the membrane, or get photos, before you tile over it?
- If it leaks, which warranty covers it, and for how long?
For the full list, including permits, payments and hidden damage, read our questions to ask before you hire.
Frequently asked questions
Is grout waterproof?
No. Cement grout is porous, and sealers only slow down how fast it absorbs water. That's why a tiled shower needs a waterproofing membrane behind the tile. With the membrane in place, water that passes through the grout stops at the membrane and drains away instead of reaching the wallboard or framing.
What is a shower moisture barrier?
It's the layer that keeps water and moisture from reaching the wall framing. In older showers, that was often plastic sheeting behind the backer board. Today, many showers use a bonded membrane directly behind the tile, which waterproofs the surface and slows vapor in one layer. The method has to match the wall, so ask which one your contractor uses and why.
Is a sheet membrane better than a liquid membrane for a shower?
Neither is better across the board. A sheet membrane comes in a fixed factory thickness, but its seams and thin-set bond have to be done exactly to the maker's instructions. A liquid membrane is seamless and wraps odd shapes easily, but it has to be applied in enough coats to the right thickness and allowed to cure. Either one can fail if it's installed carelessly, so ask how it will be installed and flood-tested.
My shower is on an outside wall. Does that change the waterproofing?
It can. Exterior walls in North Dakota get cold in winter, and how the wall is insulated and how vapor is controlled has to work with the membrane. On an exterior wall, the insulation has to meet code, and Schluter's installation handbook says to avoid a double vapor barrier, so plastic sheeting shouldn't go behind the KERDI membrane. Ask about it at your estimate visit so it's planned before demo.
Want a shower that's waterproofed the right way? Call or text Viktor at (701) 329-9659 with your town, photos and what you want to change. Our office follows up during business hours. You can also request a free written estimate through the form on this page. We're licensed in North Dakota, and our employees are covered by WSI.
Planning a shower remodeling in Bismarck–Mandan?
Free in-home consultation and a written estimate before any work starts.
Related guides
Tile Shower vs. Acrylic Shower Insert: Which One Fits Your Home?
An acrylic insert is usually faster and cheaper to install, and its smooth surface has few or no seams to clean. A tile shower cos…
Read the guide
10 Uncomfortable Questions to Ask a General Contractor Before You Hire Them for a Shower Remodel
A shower remodel is one of those projects where the problems don't show up on day one. On day one, everything looks great: new til…
Read the guide
How Much Does a Shower Remodel Cost in Bismarck-Mandan?
Recent HHI estimates for shower work in Bismarck-Mandan run from $3,500 to replace a tile-look surround and $4,000 for a standard …
Read the guide
Not ready to talk yet? Browse our catalog first.
Showers, bathrooms, basements, kitchens and floors we build, with the options and materials explained in plain English. We send it to your inbox. No calls.
Get your free estimate
Takes about a minute. Our office follows up during business hours; Viktor confirms the visit and the written scope.

Viktor, your general contractor, coordinates your estimate
- Our office follows up during business hours
- Free in-home consultation in Bismarck–Mandan
- Written estimate before any work starts